

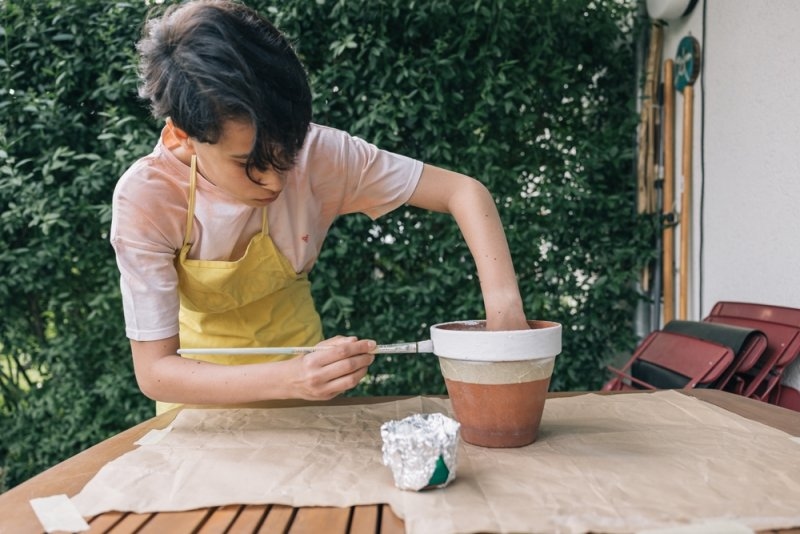
Painting plain clay pots is one of those fun, low-cost home projects that gives a room a quick lift. You’d be surprised how a basic terracotta pot can turn into something eye-catching—a colourful planter, a striped accent, or even something totally personal with just a few supplies. The tricky part isn’t really the painting. It’s that clay soaks up moisture, and the texture is rough, so if you skip prepping, the paint just doesn’t stick or flakes off.
How your pot turns out also depends on where you put it. For indoors, things are pretty simple. If the pot’s going outside, you need to be more careful with protection. Here, you'll get step-by-step tips on painting clay pots, choosing the right paint, creating easy designs, and making sure the finish doesn’t peel.
A good clay pot painting project starts before the first brushstroke, especially when the pot is porous, dusty, or already weathered.
Getting them ready ahead of time saves you hassle later. Wash each pot with some mild soap and water, scrub off any dirt, and give it a good rinse. Let it dry all the way—overnight’s best. If there’s moisture left inside the clay, paint won’t stick right.
If the pot has old flaking paint, remove loose sections gently with fine-grit sandpaper. Wipe away the dust afterwards. This basic preparation makes painting clay pots much easier.
If you are wondering how to paint terracotta pots, keep the process simple. If the surface feels especially rough or porous, start with a primer. After that, use thin layers of paint instead of piling on one thick coat.
Here’s a straightforward order that works:
Anyone can use this method—whether you’re just starting out or tackling a more detailed clay pot project.
Also Read: Unique and Amazing Painted Flower Pot Ideas for Every Home
The paint you pick really depends on where your pot will live—indoors or outside—and if you actually plan to use it or just want something decorative.
Acrylic paint is the go-to for most cases. It’s quick to dry, you get loads of colours, and it’s easy to build up layers. If your pot’s headed outdoors, go with exterior acrylics.
Oil-based paints are tough, but they take a long time to dry and aren’t great for fast projects. If you prefer spray paint, that works too—just do it in a well-ventilated spot and use several light coats for even coverage.
| Paint Type | Indoor Pots | Outdoor Pots | Best Use |
|---|---|---|---|
| Acrylic | Excellent | Good with sealer | Designs and base coats |
| Exterior acrylic | Excellent | Better choice | Outdoor decoration |
| Spray paint | Good | Good with protection | Smooth, bold finishes |
| Oil-based paint | Good | Good | Durable decorative surfaces |
Can you paint clay pots with acrylic paint? Yes. In fact, acrylic paint for clay pots is one of the easiest options for beginners. It spreads well over primed clay and can be mixed to create custom shades.
For example, paint the entire pot sage green, add small cream dots around the rim, then finish with a simple geometric band. Nothing complicated is needed for a convincing result.
Painting clay pots becomes more interesting when the design matches the room instead of simply adding random colours.
Good clay pot painting ideas include wide colour blocks, tiny dots, curved lines, checker patterns, botanical shapes, and simple faces. You can also leave sections of natural terracotta visible. That contrast often looks better than covering everything.
For a modern room, try black and white geometric shapes. For a child’s room, use cheerful colours and oversized dots. A kitchen herb pot can use hand-painted labels such as basil, mint, or thyme.
When learning how to paint clay pots with acrylic paint, start with a light base colour. Dark designs are easier to control over a pale background. Use a small angled brush for lines and a dotting tool or cotton swab for circles.
Do not overload the brush. Too much paint can collect around edges and dry unevenly.
Don't Miss: How To Seal Painted Flower Pots For Long-Lasting Protection?
Outdoor pots face sun, rain, temperature changes, and repeated watering, so decorative paint needs more protection than an indoor project. Wondering if you can use acrylic paint on clay pots? Absolutely.
For outdoor pots, stick to thin layers and let them cure properly. Exterior acrylic is usually your best bet. And don’t paint until the pot feels bone dry. Water must still escape. If the entire pot is painted, make sure the inside has also dried properly before planting.
Learning how to paint terracotta clay pots is mostly about respecting the material. Terracotta is porous, so it can absorb moisture from soil and watering. A thick decorative layer may eventually crack when conditions change.
For that reason, several thin coats are safer than one heavy coat. Let the surface dry between coats. Rushing this part usually shows later.
Sealing is useful when you want the design to last longer, but the sealer must suit the pot’s intended location. If you are learning how to seal painted clay pots, wait until all paint has dried and cured according to the product instructions. Apply a clear acrylic or outdoor-rated sealer in light coats rather than flooding the surface.
Work outdoors or in a well-ventilated area when the product requires it. Avoid sealing drainage openings. A sealed pot that cannot drain properly can create plant problems.
Knowing how to seal clay pots after painting also depends on the finish you want. Matte sealers keep the surface understated; satin or gloss finishes make colours appear stronger.
Sealing does not make a clay pot indestructible. It simply adds protection. Outdoor pots may still need occasional touch-ups, particularly in harsh weather.
Small mistakes can ruin an otherwise good clay pot painting project, but most are easy to prevent.
When you paint clay pots, avoid painting over dust, dampness, or loose old coatings. Do not apply thick layers just to finish faster. They may dry on the outside while remaining soft underneath.
Another common mistake is skipping a test patch. Different surfaces—raw, primed, or already painted clay—can change how paint goes on. If you’re not familiar with a paint or product, test a little spot on the bottom or inside first.
Suggested Reading: Aesthetic Flower Pot Painting Ideas for Modern Homes
You don’t need special art skills for this. It’s really about surface prep, using the right paint, and letting everything dry long enough. For most projects, acrylic paint gets the job done, but if the pot is sitting outside, use special outdoor products and sealers.
Stick with simple designs when you’re getting started. Try out your colours first, make sure the drainage hole stays clear, and don’t rush the layers. Clay pot painting is cheap and personal—honestly, you don’t need a perfect result to end up with something you like. A few colours, simple patterns, and even a bit of uneven brushwork can give your pot more character than anything you’d buy in a store.
Yes, you can. Just don’t put decorative paint where it’ll touch the soil, roots, or the plant parts you’ll eat. If you’re worried, use a plain liner pot inside.
Painting prior to planting will make it easier, as the pot is free to manoeuvre as well as drying. Talking about planting time: Plant after the finish has totally cured.
You can, but painting inside can block the clay from letting moisture move through. For plants that like good drainage, leaving the inside bare works better.
It depends on the type of paint, how thick your coats are, the humidity, and temperature. Check your paint’s label for drying times—don’t just go by touch.
Generally, these are easily cleaned using gentle soap and a mild cleaning cloth. Do not scrub with abrasive materials, as it may cause paint to become desensitised or dim.
This content was created by AI